Remove Scratches from Photos: 4 Things to Compare in AI Tools
Why scratches look worse than you remember
You pull a photo from a shoebox and the damage hits harder than expected. That 1960s wedding print doesn't just have a scratch — it has water stains bleeding into the emulsion. The 1940s military portrait has scuff marks and crushed contrast. The 80s Polaroid went dull years ago, and the fading makes every scratch line twice as visible.
This is why a real remove scratches from photos workflow needs more than selective blurring. The best scratch removal AI tools rebuild missing detail, smooth abrasion marks, and correct surrounding tone so the repaired area blends with skin, fabric, and background. That difference — between erasing a line and actually restoring what was underneath — is what separates a good photo scratch repair app from a gimmick.
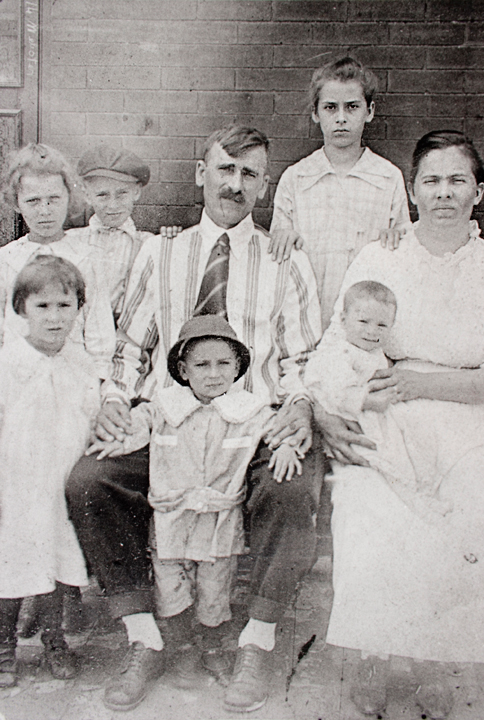
Before Restoration
Faded, grainy, and deteriorated vintage photo

After RestoreGram
Vibrant, clear, and beautifully restored
Top scratch removal AI tools: what to compare before you pay
Not every scratch repair app is solving the same problem. Some smooth the scratch line but leave the rest of the photo looking flat. Others rebuild texture and correct fading in the same pass. Before you commit to anything, pick your single worst photo and run it through every tool you're considering. That one image will tell you more than any feature list.
1. Scratch removal quality: detail vs. plastic smoothing
Zoom in on the repaired area. Good scratch removal AI reduces the line while preserving fine detail — eyelashes, fabric weave, individual hair strands. If the repaired zone looks waxy, or the face structure shifts even slightly, the tool is replacing texture rather than reconstructing it. That distinction matters most on portraits.
2. Speed and consistency
Speed matters for personal use because you'll likely fix a dozen photos in one sitting. For studios, consistency matters more: you need similar quality across an entire client set. A dependable tool also cuts rework when a wedding album has thirty damaged prints and the client expects uniform results.
3. Handling mixed damage: scratches + fading + dust
Most "scratched" photos actually have layered problems — grain, discoloration, dust spots, and contrast loss stacked on top of each other. Tools that only erase the scratch line without addressing surrounding fading leave a repaired patch that stands out like a fresh coat of paint on a weathered wall.
4. Output control: resolution, format, and cropping
After restoration, you may need to resize the image for a specific print size or archive standard. Make sure your tool gives you enough control over the final file — resolution, format, and framing all affect whether the restored photo actually gets used.
Where RestoreGram fits for scratch removal
RestoreGram is built for the kind of damage real photos actually have: scratches layered with tears, fading, dust, grain, and color shifts. Upload a photo, and the AI restores it in seconds — no manual masking, no layer-by-layer cleanup. The goal is to remove scratches from photos without losing the original character of the image.
For family archives, the biggest win is fewer manual passes. Most people start with one wedding photo where scratches are the obvious problem, then realize there's also water damage, contrast loss, and uneven color underneath. RestoreGram reduces abrasion while correcting tone and clarity so repaired faces and clothing look like they belong to the original moment — not a different photo entirely.
Photos that respond well to RestoreGram
- 1960s wedding prints with diagonal scratches and faded skin tones — restoration improves contrast while reducing line damage.
- 1940s military portraits with heavy scuffing — scratch removal AI brings the face outline and background texture back into focus.
- 1980s Polaroid scans with dust specks and grain — cleanup reduces the cloudy look and sharpens key details.
Studios can fold RestoreGram into a practical delivery workflow: restore the master scan, generate proof previews, then format final outputs for client handoff. If you need to share progress before delivery, proof with a watermark using this tool, then remove it for the final file.
Pricing reality check (2025)
RestoreGram starts at $0.99 one-time for a small batch of restores, then scales to Pro and Max plans for heavier studio usage. But don't just compare cost per credit. The better question: do restored images reduce revision rounds? Fewer "can you try again?" messages from clients often matter more than saving a few dollars upfront.
The workflow most people skip
A scratch removal AI tool handles the heavy lifting, but your scan quality and post-processing steps determine whether the result looks natural or obviously repaired. Follow this sequence.
Step 1: Start with the sharpest scan possible
Scan at 600 DPI with a flatbed scanner if you have one. Avoid glare, keep the glass clean, and press the photo flat. AI can remove scratches, but it can't invent micro-detail that wasn't captured in the source. If you're working from a phone photo, retake it with better lighting and a steadier angle before uploading.
Step 2: Restore once, then refine
Running restoration multiple times can over-correct textures — skin starts looking smoothed, backgrounds lose grain structure. Restore once for the cleanest baseline, then adjust framing with cropping if needed.
Step 3: Optimize formats for delivery
For web previews, compress for email and chat. For print, preserve full quality. Use the format converter to switch between PNG, JPG, and WebP depending on where the photo ends up.
Step 4: Set expectations with a simple proof
In areas where the emulsion is completely gone — deep gouges, torn corners — some detail loss may remain even after AI repair. A quick before-and-after comparison prevents disappointment and builds trust, whether you're showing a client or a family member.
Which photo scratch repair app should you choose?
Choose based on the damage you see most often. If you're restoring family albums with mixed issues — fading, dust, discoloration on top of scratches — look for a photo scratch repair app that addresses all of it in one pass, not just the visible lines.
If you run a photo studio, prioritize consistency and turnaround. Your workflow should scale cleanly: restore the master, crop and reframe for albums, optionally watermark proofs, then deliver print and web versions. RestoreGram fits that pattern because it targets the most common photo-damage types without requiring manual intervention for each one.
For a broader restoration workflow beyond scratches, the complete photo restoration guide covers the full process. For color-specific improvements, see the AI colorization guide. And if you're archiving originals for the long term, bookmark the photo preservation guide.
The 2025 decision rule: zoom to 100–200% on a restored photo. If faces look natural and textures hold up, you've found the right tool. If skin looks blurred or backgrounds feel artificially rendered, either switch tools or improve your scan quality first.
Restore Your Photos in Seconds
RestoreGram uses AI to fix scratches, tears, fading, and damage. Download free on iOS and Android — restore your first photo in under 10 seconds.
Try RestoreGram Free →