Best Way to Digitize Old Photos for AI Restoration
Clean scans are the difference between "restorable" and truly restored
My grandmother's shoebox photos had fused together after decades in a humid attic. The first ones we digitized with a phone camera looked fixable enough—but once we ran them through AI restoration, the results came back soft and flat. When we rescanned the same prints on a flatbed, even the scratched ones restored sharper, because the input preserved faces, edges, and real tonal range.
That's the core lesson for anyone looking for the best way to digitize old photos: capture detail the AI can actually use. Facial features, clothing texture, handwriting on the back, small background cues—these are the signals restoration models rely on to rebuild missing areas convincingly.
How to scan old photos for restoration
Use a flatbed scanner whenever possible. Place the photo glass-down, wipe dust from both surfaces, and be cautious with auto features. Most scanner controls—especially auto exposure and "smart" corrections—misread faded prints, smoothing out the very detail you need to preserve.
Recommended photo scanning settings
- Resolution: 600 DPI for standard prints; 1200 DPI for passport-size or heavily damaged images.
- Color mode: Scan in color even for black-and-white prints—fading patterns help guide more natural recovery.
- File format: Save as TIFF for archiving; use JPG for everyday restoration workflows.
- Bit depth: 24-bit color or higher preserves subtle skin tones and washed-out areas.
Handling and lighting tips
- Keep photos flat. Don't bend corners—distortion forces the software to guess at geometry.
- Disable enhancements. Turn off auto-crop, sharpening, and any built-in "photo restoration" filters so your scan stays accurate.
- Spot check first. Scan one photo, zoom to 200–300%, and confirm sharpness on faces and text before processing the batch.
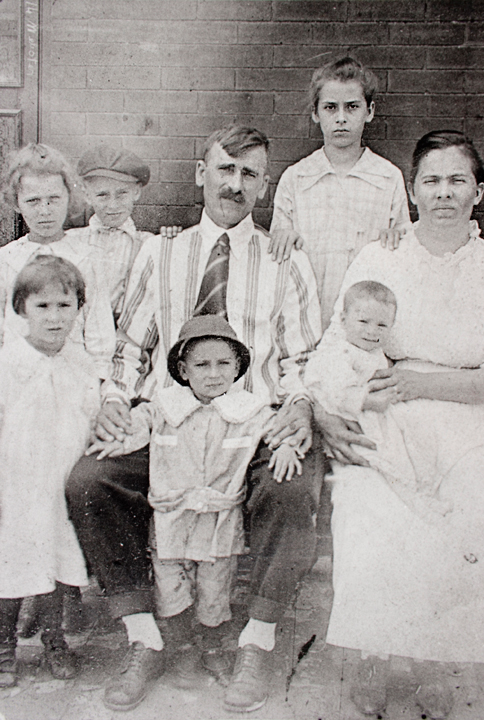
Before Restoration
Faded, grainy, and deteriorated vintage photo
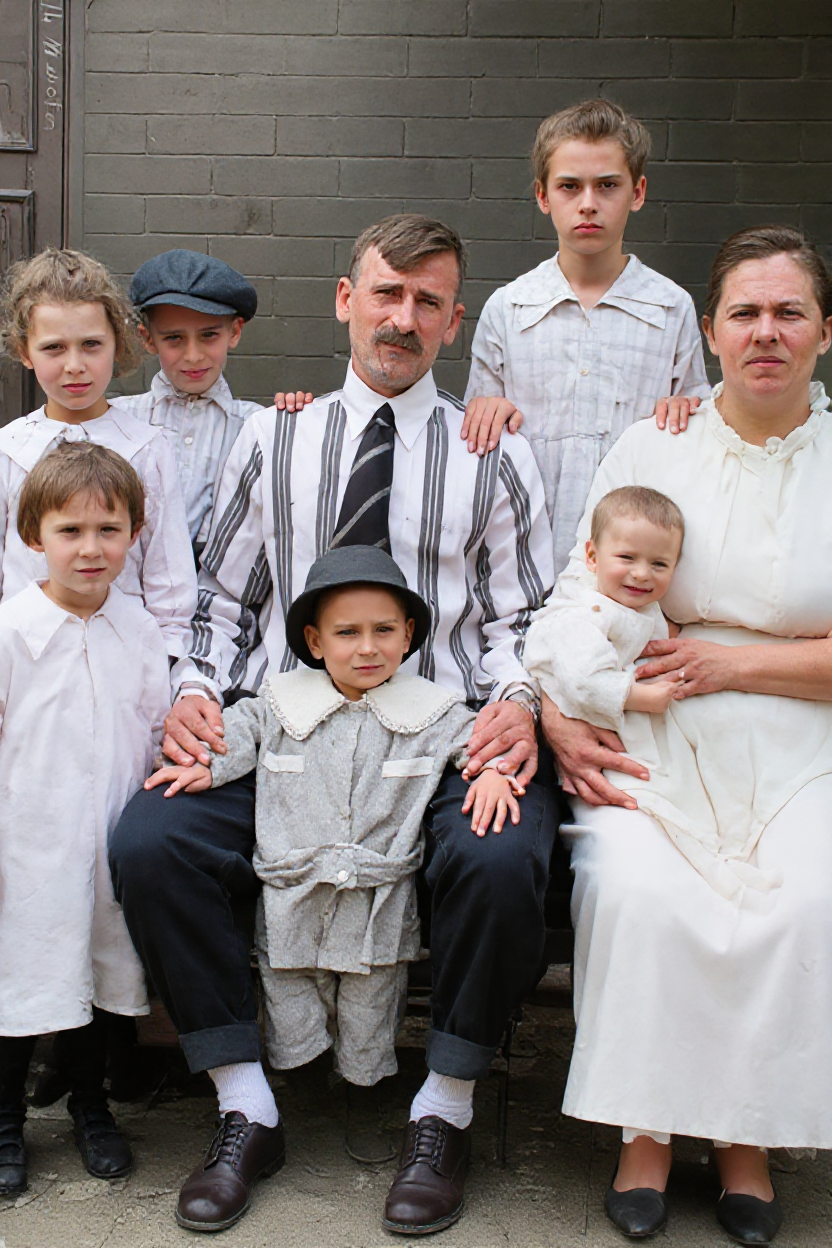
After RestoreGram
Vibrant, clear, and beautifully restored
A fast digitization-to-restoration workflow
Once your photo scanning settings are locked in, keep the process consistent. Small batches help you catch problems early—especially when you're digitizing hundreds of prints.
- Create an archive folder: Name it "FamilyPhotos_YYYY" with subfolders by decade or event.
- Scan to archive: Save originals as TIFF with clear filenames (e.g., 1965_Wedding_JohnMary.tiff).
- Create working copies: Convert TIFFs to JPG for uploads and faster processing.
- Restore: Upload the working copy to RestoreGram and let AI repair scratches, tears, fading, and contrast loss.
- Quality check: Compare eyes, text, and edges at full zoom against the original scan.
After restoration: sharing and printing without losing quality
Restored scans can be large. Archive the high-resolution originals, then generate sharing-friendly files from the restored output:
- Email and messaging: Compress the image to reduce file size without visible loss.
- Cross-platform viewing: Convert formats to PNG, JPG, or WebP depending on the destination.
- Framing or albums: Crop to reframe around faces after repair.
- Client proofing: Add a temporary watermark before sending previews.
For a deeper dive, start with the complete photo restoration guide, then explore colorizing black-and-white photos and long-term photo preservation.
The most reliable way to digitize old family photos for AI restoration is still straightforward: scan carefully, save clean originals, and restore from a quality working copy. When your input keeps sharp faces and true tones, the output looks like the photo was always meant to be seen that way.