How to Remove Scratches and Creases from Old Photos: A Studio Guide
Why Scratches and Creases Are the Most Common Damage You'll See in Your Studio
If you run a photo restoration studio, you already know the drill. A customer walks in clutching a crumpled envelope, pulls out a family portrait from the 1970s, and asks if you can make it look new again. The photo is covered in white scratches, has a deep crease running right across someone's face, and the corners are bent beyond recognition. This is your bread and butter — and getting great at scratch and crease removal is what separates a good studio from a great one.
Scratches and creases account for roughly 60-70% of the physical damage we see on old prints. They happen from decades of handling, improper storage, being shuffled between albums, or simply living in a shoebox in someone's attic. Unlike fading or water damage, scratches and creases create structural disruptions in the image — meaning the actual surface of the photo has been physically altered, removing or displacing the emulsion layer.
The good news? Whether you're dealing with fine surface scratches or deep creases that have cracked through to the paper backing, modern tools and techniques make it possible to repair damaged photos with results that would have been unthinkable even five years ago. Let's walk through exactly how professional studios handle these restorations, step by step.
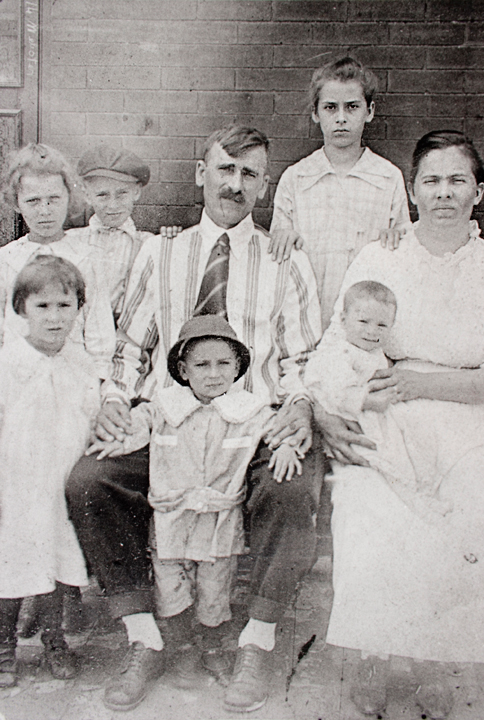
Before Restoration
Faded, grainy, and deteriorated vintage photo

After RestoreGram
Vibrant, clear, and beautifully restored
Understanding the Types of Scratches and Creases (And Why It Matters)
Before you touch a single tool, you need to assess what you're actually dealing with. Not all scratches are created equal, and your approach to a light surface scratch should be completely different from your approach to a deep gouge. Taking 30 seconds to categorize the damage will save you significant time during the actual restoration.
Surface Scratches
These are the fine, hairline scratches that appear as thin white or light lines across the photo. They've only affected the top layer of the emulsion and haven't penetrated to the paper base. Surface scratches are the easiest to fix digitally because the underlying image data is often still partially intact. You'll typically see dozens of these on any photo that's been handled frequently or slid in and out of albums.
Deep Scratches and Gouges
These are the ones that make your heart sink a little. Deep scratches have cut through the emulsion entirely, sometimes even scoring into the paper base. They appear as bright white lines because the photographic layer has been completely removed, exposing the white paper beneath. Fixing these requires rebuilding missing image information — essentially, you're painting back what's no longer there.
Creases and Fold Lines
Creases are a different beast altogether. When a photo is folded or bent, the emulsion cracks along the fold line, creating a complex pattern of damage. A single crease can contain dozens of micro-fractures, areas of lifted emulsion, and discoloration. The crease itself often appears as a white or dark line, sometimes with a slight ridge of displaced material on either side. These are among the most challenging repairs because they affect a wide area and often distort the image geometry slightly.
Corner Damage and Bends
Bent corners and edges are technically creases, but they present unique challenges because they often affect areas with less visual information to reference. A bent corner on a portrait background is straightforward; a bent corner that cuts through someone's shoulder requires careful reconstruction.
The Professional Scanning Process: Getting the Best Starting Point
Your restoration is only as good as your scan. This is something many studios underestimate, and it's the single biggest factor in how easy or difficult the scratch removal process will be. A mediocre scan of a scratched photo can actually make the scratches more prominent and harder to fix.
Scan at a minimum of 600 DPI for standard prints, and 1200 DPI if the photo is smaller than 4x6 inches. Higher resolution gives you more pixel data to work with around the scratch edges, which makes blending and cloning dramatically smoother. If you're working with a photo that needs significant enlargement after restoration, consider scanning at 1200 DPI regardless of the original size. You can always use a tool like our image resizer to adjust the final output dimensions.
Here's a trick many experienced restorers use: scan the photo twice — once face-up and once face-down (or at a slightly different angle). Surface scratches that catch the light in one orientation may be less visible in another, giving you a cleaner reference layer to work from. Some flatbed scanners also have a "Digital ICE" or infrared scratch detection feature that can automatically reduce surface scratches during the scan itself.
Clean the scanner glass meticulously before every scan. Use a microfiber cloth and, if needed, a small amount of isopropyl alcohol. Dust particles on the glass will show up as additional spots and scratches in your scan, adding unnecessary work to your restoration. Also, gently clean the photo surface with a soft brush — never use liquid cleaners on the photo itself.
Step-by-Step: How to Remove Scratches from Old Photos
Now let's get into the actual restoration workflow. Whether you're using Photoshop, Affinity Photo, GIMP, or AI-powered tools like RestoreGram's AI restoration engine, the fundamental principles remain the same. Here's the process that professional studios follow to consistently deliver high-quality results.
Step 1: Create Your Working Layers
Never work on the original scan layer. Duplicate it immediately and name it something like "Restoration Work." Create a separate layer for scratch removal and another for crease repair. This non-destructive approach lets you undo specific fixes without losing other work, and it gives your client the ability to compare before and after at any point.
Step 2: Address Large Creases First
Start with the biggest damage. For deep creases, use the Clone Stamp tool at 70-80% opacity with a soft brush. Sample from an area immediately adjacent to the crease — this ensures the texture, grain, and tonal values match as closely as possible. Work in short strokes along the crease, constantly re-sampling as you go. Don't try to fix the entire crease in one pass; build up the repair gradually across multiple strokes.
For creases that cross faces or other detailed areas, switch to the Healing Brush tool, which automatically blends texture and color from the source area. Be careful around edges like hairlines, jawlines, and clothing boundaries — the healing brush can smear these if your brush is too large. Reduce your brush size to just slightly wider than the crease itself.
Step 3: Remove Fine Scratches Systematically
For networks of fine surface scratches, work in sections rather than trying to fix them all at once. Zoom in to 200-300% and methodically move across the image in a grid pattern. The Spot Healing Brush works exceptionally well for fine scratches — simply paint along the scratch line and the tool will automatically sample surrounding pixels to fill it in.
For studios processing high volumes of old photo scratch repair work, this is where AI tools become invaluable. RestoreGram can automatically detect and remove fine scratches across an entire image in seconds, handling the tedious work so you can focus your manual skills on the complex areas that require a human eye. Many studios use a hybrid approach: AI for the initial pass, then manual touch-up for problem areas.
Step 4: Rebuild Missing Detail
Where scratches or creases have completely destroyed image information, you'll need to reconstruct what was there. This is where restoration becomes an art. Use context clues: if a scratch runs through someone's eye, use the other eye as a reference. If a crease has destroyed part of a patterned dress, clone from an undamaged section of the same pattern.
For backgrounds, the Content-Aware Fill feature (in Photoshop) or equivalent tools can work wonders. Select the damaged area, apply content-aware fill, and the software will intelligently reconstruct the background based on surrounding pixels. This works beautifully for smooth or repetitive backgrounds but may need manual refinement for complex scenes.
Step 5: Match Grain and Texture
This is the step that separates amateur restorations from professional ones. After removing scratches and creases, the repaired areas often look slightly smoother than the surrounding image because the original film grain has been disrupted. Add a subtle noise layer (Gaussian, monochromatic) to the repaired areas to match the grain of the original. Adjust the intensity until the repair blends invisibly.
Step 6: Final Review at Multiple Zoom Levels
Review your work at 100% zoom, 50% zoom, and fit-to-screen. Scratches that are invisible at high zoom can sometimes create subtle tonal inconsistencies visible at normal viewing distance. Also review in grayscale mode — this removes color distractions and makes tonal mismatches immediately apparent.
Handling the Toughest Cases: Creases Across Faces and Critical Details
The restoration jobs that keep studio owners up at night are the ones where a deep crease runs right through the most important part of the image — usually a face. A crease across a forehead is one thing; a crease that bisects both eyes and the nose is a completely different challenge. Here's how to approach these critical repairs.
Symmetry is your best friend. Human faces are roughly symmetrical, which means if a crease has destroyed the left eye, you can often mirror the right eye, adjust it for the slight natural asymmetry, and blend it into place. Flip the cloned section horizontally, adjust the position, and use a layer mask to blend the edges seamlessly.
For creases through mouths or expressions, proceed with extreme caution. The mouth is the most expressive part of the face, and even tiny errors will make the restoration look "off" to the viewer. If possible, ask the client if they have any other photos of the same person from a similar era — even a different photo can provide reference for facial features.
When a crease has caused the photo to physically shift — meaning one side of the crease is slightly offset from the other — you'll need to correct this misalignment before doing any detail work. Select one side of the crease, use Free Transform to nudge it back into alignment, and then proceed with the scratch removal. Skipping this step will result in features that don't quite line up, and the human eye is incredibly sensitive to facial misalignment.
Building an Efficient Studio Workflow for Scratch and Crease Removal
If you're running a studio that handles dozens of damaged photo restoration jobs per week, efficiency isn't optional — it's survival. Here's how successful studios structure their workflow to maximize quality while keeping turnaround times reasonable.
Triage and Categorize
Sort incoming jobs into three categories: light damage (surface scratches only, 15-30 minutes), moderate damage (deep scratches and minor creases, 30-90 minutes), and heavy damage (major creases, missing sections, facial damage, 90+ minutes). This helps with pricing, scheduling, and setting accurate client expectations.
Use AI for the First Pass
Run every scanned photo through AI restoration as your first step. Tools like RestoreGram can handle the bulk of surface scratch removal, colorization if needed, and general enhancement automatically. For light damage jobs, the AI output may be sufficient with minimal manual touch-up. For moderate and heavy damage, the AI pass reduces your manual workload by 40-60%.
Develop Photoshop Actions for Repetitive Tasks
Create custom actions for tasks you perform on every job: duplicating the background layer, creating a grain-matching noise layer, applying your preferred sharpening settings, and setting up your standard layer structure. These small automations add up to significant time savings across hundreds of jobs.
Quality Control Checklist
Before delivering any restoration, run through a quick checklist: Are all visible scratches removed? Do repaired areas match the surrounding grain? Are skin tones consistent across repaired and original areas? Does the image look natural at print size? Having a standardized QC process prevents embarrassing oversights and builds client trust.
For long-term preservation advice to share with your clients after the restoration is complete, our guide on how to preserve old family photos covers proper storage and handling techniques that will prevent future scratch and crease damage.
Delivering Results That Keep Clients Coming Back
The technical skills of removing scratches and creases from old photos are essential, but what truly builds a studio's reputation is the overall experience. Always deliver the restored image alongside the original scan so clients can see the transformation. Consider creating a simple before-and-after comparison image — these are powerful for client satisfaction and, with permission, make excellent portfolio pieces for your website and social media.
Offer your restored files in multiple formats: a high-resolution TIFF or PNG for archival purposes, a JPEG for easy sharing, and if the client wants prints, ensure the file is properly sized and color-profiled for your print lab. Going this extra step positions your studio as a full-service preservation partner, not just a quick fix shop.
Finally, remember that every scratched and creased photo that comes through your door represents someone's irreplaceable memory. The technical process of restoring scratched photos is important, but the real value you provide is giving families back a piece of their history they thought was lost forever. Master the craft, invest in the right tools, and never stop refining your technique. Your clients — and their grandchildren — will thank you for it.