How to Remove Scratches and Creases from Old Photos: A Studio Guide
Why Scratches and Creases Are the Most Common Damage You'll See in Your Studio
If you run a photo studio or graphic restoration service, you already know the drill. A client walks in clutching a precious family photo — maybe it's their grandmother's wedding portrait or a faded snapshot of a parent who's no longer alive. And almost every single time, that photo has scratches, creases, or both.
Scratches and creases account for roughly 70% of the physical damage we see on printed photographs. They happen from decades of handling, improper storage, being tucked into wallets, slipped between book pages, or simply moved from one shoebox to another over the years. Unlike water damage or chemical deterioration, scratch and crease damage follows predictable patterns — which means it's highly repairable when you know what you're doing.
The good news for studios is that this type of work represents a massive, recurring revenue stream. Clients will pay premium prices to remove scratches from old photos and restore them to a condition they never thought possible. The key is having the right workflow to deliver stunning results efficiently, without spending three hours on a single image.
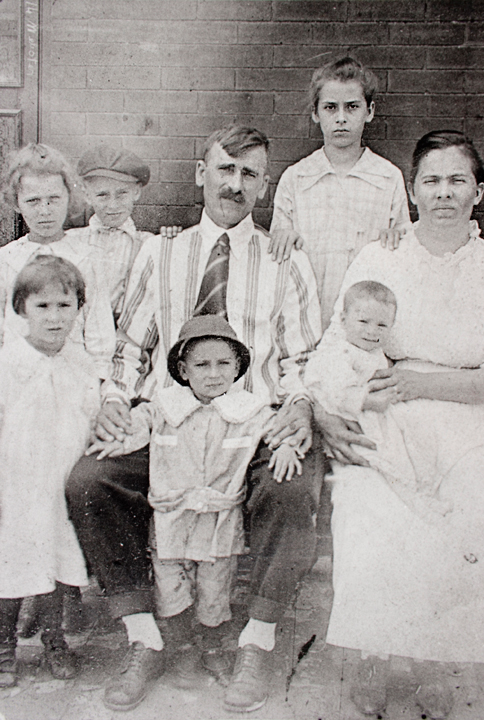
Before Restoration
Faded, grainy, and deteriorated vintage photo

After RestoreGram
Vibrant, clear, and beautifully restored
Understanding the Types of Scratch and Crease Damage
Before you touch any tool — digital or physical — you need to accurately assess what you're dealing with. Not all scratches are created equal, and the repair approach for a surface-level scratch is very different from a deep gouge that has removed the emulsion layer entirely.
Surface Scratches
These are the lightest form of damage. Surface scratches affect only the top coating of the photograph and typically appear as thin, white or light-colored lines. They haven't penetrated the emulsion layer, which means the underlying image data is still intact. These are the easiest to fix and often respond beautifully to both manual and AI-based restoration.
Deep Scratches and Gouges
Deep scratches cut through the emulsion layer and sometimes into the paper base itself. You'll recognize them because they often appear as stark white or colored lines where the image information has been physically removed. To repair damaged photos with this level of destruction, you need to reconstruct missing image data — either by cloning from surrounding areas or using AI to intelligently fill in the gaps.
Creases and Fold Lines
Creases are caused by bending or folding the photograph. They create a line of damage that's usually wider than a scratch and often accompanied by cracking in the emulsion. A single crease across a face can be devastating to a portrait. The challenge with creases is that they distort the underlying image in both directions along the fold, meaning you're dealing with misalignment as well as missing data.
Combination Damage
Most photos that come through your studio will have multiple types of damage simultaneously — scratches layered over creases, combined with fading, discoloration, and sometimes water stains. Developing a systematic approach to old photo scratch repair that accounts for layered damage is what separates professional studios from hobbyists.
The Professional Scanning Workflow: Getting It Right Before Restoration Begins
Your restoration is only as good as your scan. This is a point many studios underestimate, especially when clients bring in their own phone snapshots and ask you to work from those. Educating clients on proper scanning — or offering it as a service — dramatically improves your final results.
For photos with scratches and creases, scan at a minimum of 600 DPI, and ideally 1200 DPI for heavily damaged prints. The higher resolution gives you more pixel data to work with when reconstructing damaged areas. Use a flatbed scanner with the photo placed face-down, and avoid pressing the lid too hard on creased photos — you don't want to flatten the crease further and risk cracking the emulsion.
Here's a critical tip many studios miss: scan the photo twice — once with the scanner lid open and once with it closed. The open-lid scan will reveal the true texture and depth of scratches and creases without the glass flattening them. This gives you a reference map for where the damage actually is, which is invaluable when you're doing detailed reconstruction work.
If you're working with a client's phone photo instead of a proper scan, tools like the image resizer can help you optimize the resolution before beginning restoration. It's not a substitute for a proper scan, but it helps when that's all you have to work with.
Step-by-Step: Removing Scratches and Creases Using AI-Assisted Tools
The restoration industry has been transformed by AI in the last few years. What used to take an experienced retoucher two to three hours in Photoshop can now be accomplished in minutes with the right tools — and often with results that match or exceed manual work. Here's the workflow we recommend for studios handling volume restoration work.
Step 1: Initial AI Restoration Pass
Start by running the damaged scan through an AI restoration tool like RestoreGram. The app's AI is specifically trained to detect and remove scratches from old photos, reconstruct missing facial features, and smooth out crease damage. For many photos — especially those with light to moderate damage — this single pass will get you 80-90% of the way to a finished result.
This is where AI truly shines for studios: it handles the tedious, repetitive work of filling in hundreds of tiny scratches across an image in seconds. If you're processing 20 or 30 restorations per week, this efficiency is the difference between profitability and burnout. For a deeper dive into the AI restoration process, check out our guide on how to restore old photos with AI.
Step 2: Assess What the AI Missed
After the initial AI pass, zoom in to 100% and systematically review the entire image. Pay special attention to faces, eyes, and text — these are the areas where clients will notice imperfections immediately. Deep gouges that removed large sections of the image may need additional attention, and creases that cross critical facial features sometimes require manual refinement.
Step 3: Manual Touch-Up for Stubborn Damage
For the remaining 10-20% of damage, use Photoshop or your preferred editor. The Clone Stamp tool at low opacity (20-30%) is your best friend for blending areas where the AI reconstruction doesn't perfectly match the surrounding texture. The Healing Brush works well for isolated scratches that the AI partially addressed but didn't fully eliminate.
For deep creases that cross faces, consider using the Liquify tool very gently to correct any slight misalignment the crease caused. Creases don't just remove image data — they shift it, and sometimes the AI restoration preserves that shift. A subtle Liquify adjustment can make features look natural again.
Step 4: Final Refinement and Output
Once scratch and crease damage is resolved, address any remaining issues: color correction, contrast adjustment, and sharpening. If the original was black and white and the client wants color, this is the stage to colorize the black and white photo. Export at the highest quality your client needs — typically TIFF for print work and high-quality JPEG for digital delivery.
Pricing Your Scratch and Crease Removal Services
One of the biggest challenges studios face isn't the technical work — it's pricing it appropriately. Undercharging for damaged photo restoration is epidemic in this industry, partly because AI tools have made the work faster and studios feel guilty charging "old" rates for faster turnaround.
Here's our recommended tiered pricing framework:
- Light damage (surface scratches, minor creases): $25–$50 per image. These are photos where a single pass through RestoreGram produces a near-finished result with minimal manual touch-up.
- Moderate damage (deep scratches, multiple creases, some missing areas): $50–$100 per image. These require AI restoration plus 15-30 minutes of manual refinement.
- Heavy damage (extensive gouging, torn sections, creases across faces): $100–$250+ per image. These are complex reconstructions requiring significant manual work on top of AI assistance.
Remember: you're not charging for your time alone. You're charging for the emotional value of the restored memory, your expertise in knowing how to restore scratched photos correctly, and the years of experience that inform your decisions. Clients who walk in with their grandmother's only surviving photograph aren't shopping for the cheapest option.
Preventing Future Damage: Advice to Share With Your Clients
A great studio doesn't just restore photos — it educates clients on how to protect their images going forward. This builds trust, positions you as an authority, and often leads to additional service sales like archival printing and digital backup packages.
After completing a restoration, share these essential preservation tips with every client:
- Never store photos loose in boxes. Each print should be placed in an acid-free sleeve or envelope to prevent scratches from contact with other photos.
- Avoid touching the image surface. Handle photos by the edges only. Oils from fingers cause long-term chemical damage and attract dust that causes scratches.
- Store flat, never folded. This seems obvious, but countless photos are damaged by being folded to fit into envelopes, wallets, or small frames.
- Control the environment. Photos should be stored in cool, dry locations away from direct sunlight. Humidity causes emulsion to soften, making it far more susceptible to scratching.
- Create digital backups immediately. Once a photo is restored, the digital file becomes the preservation master. Encourage clients to store copies in multiple locations.
For a comprehensive guide you can share directly with clients, point them to our resource on how to preserve old family photos. It covers everything from storage materials to long-term digital archiving strategies.
Building a Reputation as the Go-To Studio for Photo Scratch Removal
The studios that thrive in this space are the ones that specialize and market themselves specifically as photo scratch removal and restoration experts. General photography studios that offer restoration "on the side" can't compete with a focused operation that has dialed-in workflows and consistent quality.
Start building a portfolio of before-and-after examples (always with client permission). These visual transformations are incredibly powerful on social media and your website. A single dramatic restoration — say, a heavily creased 1940s military portrait brought back to life — can generate dozens of inquiries from people who had given up on their own damaged photos.
Invest in your tools and keep your skills current. The AI restoration landscape is evolving rapidly, and apps like RestoreGram are continuously improving their ability to handle increasingly complex damage. Studios that combine cutting-edge AI tools with skilled manual finishing will consistently deliver the best results and command the highest prices.
Finally, remember that every scratched, creased, and damaged photo that comes through your door represents someone's irreplaceable family history. The technical skills matter, but it's the care and respect you bring to each image that turns one-time clients into lifelong advocates for your studio.