Fix Damaged Photos Online: Studio Workflow Checklist
Start With Intake Notes That Protect the Result
A client drops off a shoebox. Inside: a 1960s wedding photo with water stains, a scratched military portrait from the 1940s, and a faded Polaroid of someone's first birthday. Before you fix damaged photos online, you need to capture what each image needs — and what the client actually wants.
Use a simple intake form, even a note in your project tool. Record the photo type (print, scan, slide), approximate age, visible damage (scratches, tears, fading, discoloration), and any "must keep" details like uniforms, badges, or names on clothing. This is what keeps your online photo restoration workflow consistent across editors and clients.
Standardize file requirements so expectations stay aligned. Ask for a scan at 600 DPI from a flatbed scanner, or at minimum a clear phone photo taken in even light. If you only receive a low-res snapshot, enhancement can improve readability — but it can't reconstruct fully missing facial detail. Set that expectation early to avoid rework.
For a reliable starting point, RestoreGram can restore damaged photos online quickly on mobile. Use it for an immediate preview to confirm that scratches, fading, dust, and poor contrast are within reach before committing to a full edit.
Build a Repeatable Editing Pipeline
After intake, run the same pipeline for every order. The goal is speed and fewer style differences between editors. Creative drift is real — two people will deliver different looks for the same level of damage if standards aren't locked down.
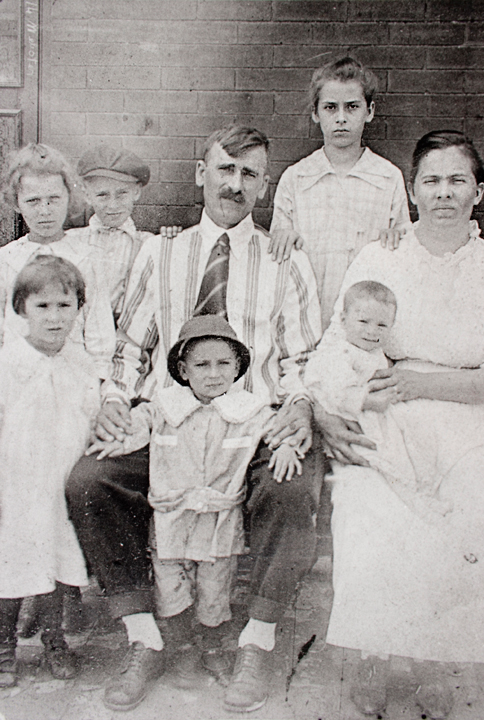
Before Restoration
Faded, grainy, and deteriorated vintage photo

After RestoreGram
Vibrant, clear, and beautifully restored
Step 1: Prepare the file. If the upload is off-center or includes borders, crop it. Crop and reframe photos so restoration focuses on the subject, not empty edges.
Step 2: Run the AI restoration preview. Upload the photo to RestoreGram for the first pass. AI restoration typically targets scratches, tears, dust, grain, fading, contrast, and discoloration. Use your intake damage map to verify what improved and what still needs manual attention.
Step 3: Pick the restoration direction. Decide upfront: natural, period-correct tone or a brighter modern look. A faded 1980s Polaroid may need gentle contrast and color balancing, not heavy clarity. A military portrait often benefits from careful tone smoothing so the uniform stays crisp.
Step 4: Handle missing areas honestly. Restoration helps when corners are torn or faces are partially obscured, but avoid "perfect reconstruction" promises. A useful rule: if more than a third of the face area is missing, communicate limitations and offer options — partial restoration versus artistic reconstruction, priced differently.
Step 5: Colorize when appropriate. For black-and-white photos, offer AI colorization as an add-on. A 1950s family portrait often gains emotional impact with accurate skin tones and period-consistent clothing colors. Align your team on a reference standard using our guide to colorizing black-and-white photos.
Your workflow is more than the AI tool. Set standards before you start, then verify against the intake notes after every restore.
Quality Control Before Delivery
Quality control is where studios earn long-term referrals. Clients don't reward "fixed" photos — they reward believable results.
Faces and edges: Check for unnatural warping around eyes, mouths, and hairlines. Scratches often vanish, but removal can leave micro-smudges. Review border transitions carefully, especially where tears and missing corners used to be.
Skin tones and color consistency: On a 1960s wedding photo with discoloration, tones should look even across faces and hands. If you colorized, keep lighting consistent across the scene so one subject doesn't look dramatically different from another.
Background cleanup: Water stains and dust are common in scanned prints. Make sure the background no longer competes with the subject. The person should be the sharpest visual anchor, not the repaired artifact.
Print readability: If the client wants frame-ready output, test contrast at the exported size. For email sharing, optimize for speed while protecting details. Use image compression so files stay small without flattening skin texture or fine clothing patterns.
If you're building a studio service for families, weddings, or legacy archives, add a preservation checklist too. For handling and scanning best practices, see how to preserve old family photos.
Export, File Naming, and Client Communication
Delivery is part of restoration. Studios waste time when files are mislabeled, sizes aren't clarified, or clients aren't told what to expect.
Export sizes: Provide at least two outputs — one high-quality version for printing and one optimized for sharing. If different labs require different formats, use format conversion to switch between PNG, JPG, and WebP. Labs typically prefer JPG at a specific DPI; web galleries look better in WebP.
Resize for real-world use: After restoring, resize the image for the client's intended print size so they don't accidentally crop important details when uploading to frames or photobook services.
Proof with timestamps: Send a proof version at reduced resolution so clients can approve before you export the final file. If you share proofs externally, use a photo watermark to protect your work during review.
Manage expectations with language: For a heavy-grain 1980s Polaroid, explain that enhancement reduces noise and improves clarity without erasing the original character. The promise should be "restored, cleaned, and clarified" — not "perfectly original." This language keeps your online photo restoration workflow honest and your refund rate low.
For a broader walkthrough covering tricky damage types, start with our complete photo restoration guide.
When turnaround matters — during peak seasons, holiday requests, or high-volume studio weeks — RestoreGram gives you a strong first restore in seconds. Your team finalizes exports, crops, and formats within the pipeline you've already built.
Restore Your Photos in Seconds
RestoreGram uses AI to fix scratches, tears, fading, and damage. Download free on iOS and Android — restore your first photo in under 10 seconds.
Try RestoreGram Free →